Affiliate disclaimer: Some links on this blog are Amazon affiliate links, meaning I may earn a commission at no extra cost to you.
Building a Self-Sustaining Low-Tech Aquarium: A 10-Month Success Story
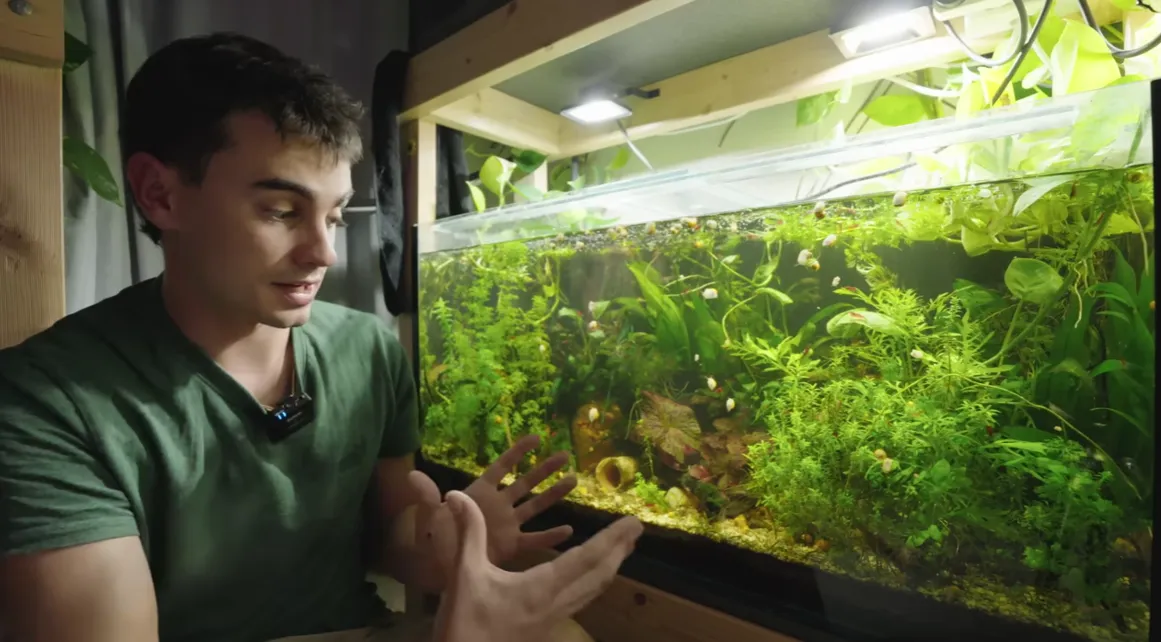
Forget CO₂ systems and expensive filters! I've seen someone maintain a thriving planted aquarium for 10+ months with minimal effort. Here's how you can replicate this low-tech, low-maintenance ecosystem.
Here is the video that inspired me:
“This tank proves nature thrives when we step back. Start simple, observe often, and let biology work!” – KeepingFishSimple
Low-Tech Setup Essentials
| Component | Details |
| Tank | 90x30x45cm glass aquarium |
| Filtration | 2 sponge filters with air-stones |
| Lighting | 2x $30 LED floodlights (10-30W) |
| Substrate | Sieved garden soil + gravel cap |
| Temperature | 23-28°C room temp (no heater required) |
| Livestock | Betta, blue-eye fish, cherry shrimp, bristlenose pleco, mystery snails |
Fish Tank Step-by-Step Setup Process
1️⃣ Prepare Nutrient-Rich Substrate
- Sieve garden soil to remove debris.
- Layer 2-3″ of soil → Top with 1″ gravel cap.
Pro Tip: Soil acts as natural fertilizer for plant roots.
2️⃣ Install Basic Equipment
- Position sponge filters on opposite sides.
- Mount LED lights 8-10″ above the water surface.
3️⃣ Hardscape & Planting
- Arrange rocks in the corner slope for visual interest.
- Plant beginner-friendly species:
AnubiasJava FernAmazon SwordWater WisteriaFloating Frogbit(natural nitrate sponge)
4️⃣ Cycle & Stock Slowly
- Wait 1 week before adding livestock.
- Start with the cleanup crew:
Cherry ShrimpMystery Snails
- Add fish gradually over 2-3 weeks.

New Tank Maintenance Routine
Here is the routine that we should maintain for our fish tank:
Daily Quick-Scan: Observe fish behavior and plant pearling. Cloudy water, clamped fins, or melting leaves signal an early imbalance—test NO₃/PO₄ and act within 24h.
Weekly – Water Change: Every 7 days, siphon 25% of the water, focusing on gravel vac in high-waste zones (under wood, behind rocks). Refill with dechlorinated, temperature-matched water poured slowly through a plate to avoid uprooting plants. While the level is low, wipe interior glass with an algae magnet; use a fresh razor blade for stubborn spots on glass only. Rinse mechanical filter media in removed tank water to preserve bacteria.
Monthly – Liquid Fertilizer: On the 15th of each month, dose a comprehensive all-in-one liquid fertilizer after lights-out. Measure exactly—overdosing triggers algae. Follow with gentle surface agitation to disperse nutrients. Two days later, inspect plant color; pale new growth means raise the next dose by 10%, and deep green algae on leaves means cut it by 10%.
Bi-monthly – Root Tabs: On the 1st of every odd-numbered month, insert one root tab 2 cm below each heavy root-feeder (swords, crypts, and vals). Push capsules deep enough to prevent leaching into the water column. Mark the date on your calendar immediately after insertion.
Also, you can do a quick check based on the maintenance task and frequency table here:
| Task | Frequency |
| Water Changes | 20-30% weekly |
| Glass Cleaning | As needed |
| Root Tabs | Every 2 months |
| Liquid Fertilizer | Monthly |
🔑 Key Insight: Dense plant growth naturally combats algae and stabilizes water parameters.
Full Setup Process Visualized by Mermaid
Here's the process to understand each step when we set up the low-tech tank:
- You start by spreading a bottom layer of nutrient-rich soil, then cap it with gravel to keep the dirt in place.
- Next, you set up the hardware: put sponge filters in the corners and mount LED lights above the tank.
- After that, you arrange rocks and driftwood to create hiding spots and visual depth.
- While the tank is still empty of water, you tuck the plants—Anubias, Java fern, and similar hardy species—into the substrate or attach them to the hardscape.
- Once everything is planted, you slowly fill the tank. The soil releases nutrients that the roots can use right away.
- Turn on the filters so gentle water flow spreads nutrients and oxygen.
- Let the tank run for about a week without fish so the filter media can build up beneficial bacteria.
- Begin stocking with hardy cleaners—small shrimp and snails—to test the system.
- When water readings stay stable, add your main fish, such as a betta or blue-eyes.
- Plants soak up nitrates; fish produce waste that fuels the bacterial cycle.
- From then on, every week you drain 20–30% of the water and replace it with fresh, dechlorinated water, while trimming any overgrown stems or leaves.
We make a mermaid sequence diagram to visualize the entire process. You can check out as per:
sequenceDiagram
    participant User
    participant Tank
    participant Plants
    participant Fish
    participant Equipment

    User->>Tank: Layer substrate (soil + gravel)
    User->>Equipment: Install sponge filters & LEDs
    User->>Tank: Add hardscape rocks
    User->>Plants: Plant Anubias/Java Fern/etc.
    Tank->>Plants: Release soil nutrients
    Equipment->>Tank: Start gentle filtration
    User->>Tank: Cycle for 1 week
    User->>Fish: Introduce shrimp/snails first
    User->>Fish: Add betta/blue-eyes later
    Plants->>Tank: Absorb nitrates
    Fish->>Tank: Produce bio-load
    loop Weekly
        User->>Tank: 20-30% water change
        User->>Plants: Trim overgrowth
    end
Lessons Learned
- Embrace chaos—let the stems grow wild and tangle; their jostling for light is nature’s own pruning service.
- Patience pays—that cloudy haze and slimy biofilm? It’s not ugly; it’s a free, 24-hour buffet for shrimp and snails.
- Low-tech ≠ no tech – A silent sponge filter bubbling in the corner is the difference between “oops, ammonia spike” and “ah, another quiet evening watching fish.”
- Look closer—tiny bubbles on leaves at dawn mean the tank is finally breathing with you.
- Color speaks—yellowing tips Ask for more iron; sudden algae shout, “Slow down the lights.”
- Routine becomes ritual – A weekly water change is the aquarium’s Sunday reset, a moment to pause, siphon, and daydream.
In the end, the glass box is a living journal; each new leaf and fin flick writes tomorrow’s page.
👉 DIY Challenge: Try replicating this setup in a 10-gallon tank! Share your results below.